- [May 2020-Oct 2020]
Code: https://github.com/ec888/Suntrack-Mirror
The goal of this project was to create a mirror + suntracker device that would rotate to reflect sunlight directly into a window, inspired by my house’s dark interior. Natural light has great effects for well-being, and is a cost-efficient and eco-friendly way to save energy.
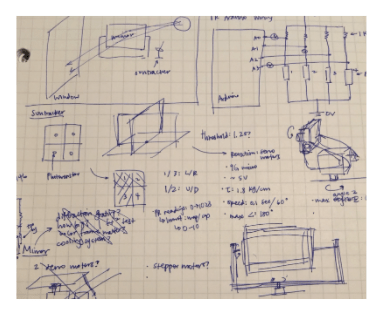
Since this was the first electrical-engineering-related project I’ve implemented from concept to creation, there was much to learn. I got to work.
After a few iterations of sketching and designing, I landed on a 2-part mirror device design: 1.) a suntracker to locate the sun, and 2.) a mirror that, based on the suntracker information, calculates the best angle to reflect the sunlight into the window, then self-rotates to that angle.
1. Suntracker
First, I built the suntracker, as it’s an independent, standalone part that makes for a good starting point. The suntracker is composed of 4 photoresistors separated by a divider, and 2 servo motors (xy plane and yz plane) which rotate until the photoresistors all have approximately equal light-level readings. I learned how to use servo motors, debug wiring errors, and improve Arduino code. The questionable jumper end connections didn’t fit quite snugly, so I also changed from using my breadboard wires + hot glue to actual soldered connections.
2. Mirror base
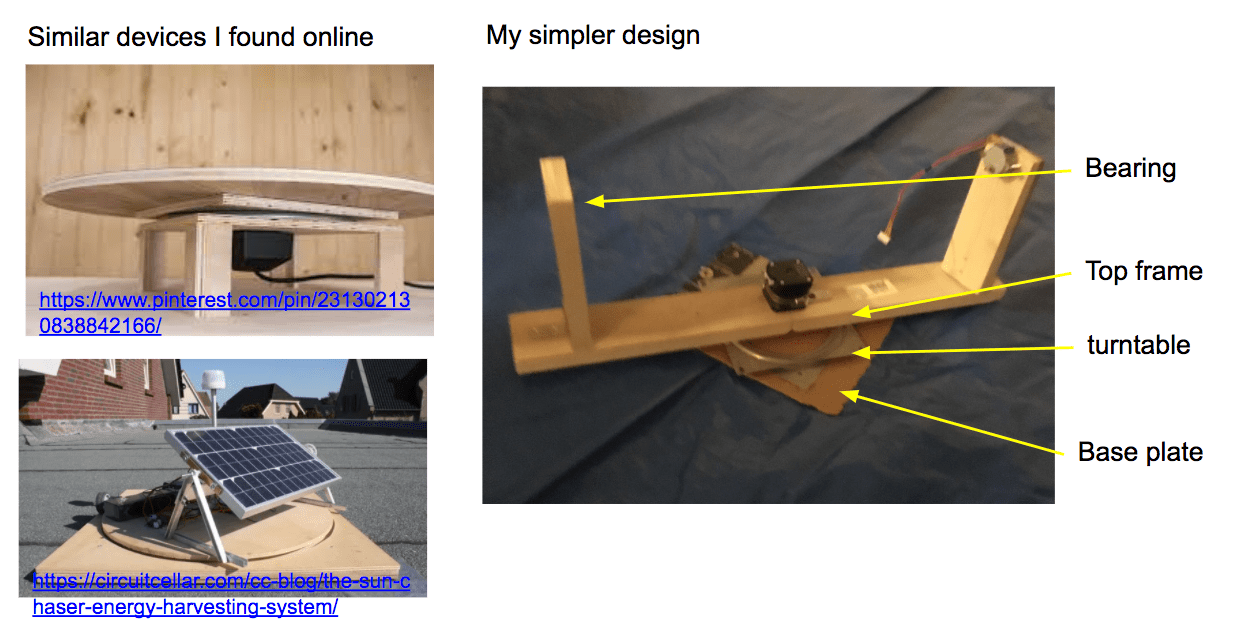
Then, I built the self-rotating mirror base, which consists of a frame that holds the mirror in place. The mechanical mirror base can accommodate 2 stepper motors that rotate horizontally and vertically, respectively. Makerspaces being closed during coronavirus, I had to come up with a design that did not require complex tools such as precision saws and 3D printers. This took several rounds of pen-and-paper design iterations.
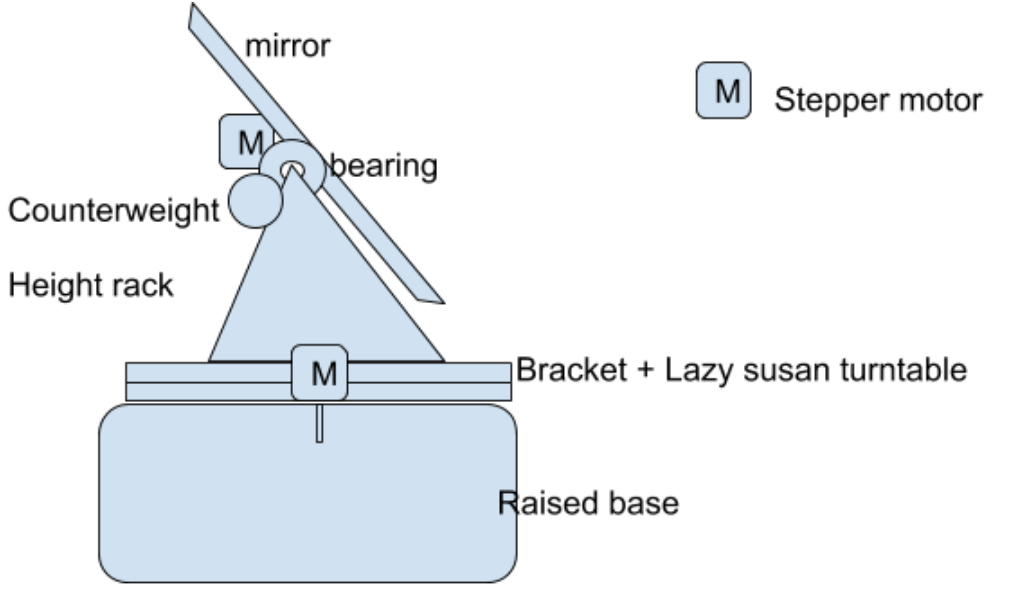
Here (right –> ) is the final design of the base. I secured the base servo motor on top, and connected it to the raised base so that it would drive the top to rotate by counteracting force from the bottom.
I also hit another interesting problem. I used a turntable with bearings to support the horizontal rotation of the mirror base, and a stepper motor to directly drive the top frame rotation, rather than the suggested gear/pulley belt. This is much simpler to build, but requires the turntable and the stepper shaft to be perfectly aligned, otherwise it would cause large resistive force to the rotation. After multiple rounds of realigning and remeasuring, I saw that getting them perfectly aligned was not very feasible. After some more time staring at the turntable, I found an elegant solution: detach the top frame from the turntable, and attach only the motor shaft to the base plate. The top frame still rests on the turntable but can slightly slide. The result: the resistance to rotation reduced to expected.
The base required 2 stepper motors: small 28YBJ-48 Stepper with ULN2003 driver to rotate the mirror vertically, and a larger NEMA-17 motor to rotate horizontally.
The second motor had two problems at first, which I resolved with the following approach:
- The A4988 driver that I bought tends to overheat. It turns out the one I bought only supports 1.2 Amps instead of max 2 amp which this setup needed. I turned down the driver’s screw dial to reduce the current (this would reduce motor torque, but this project doesn’t need large torque thanks to the turntable).
- At first, the NEMA stepper motor only hummed without moving at first. It turns out that all stepper motors did this at a speed below the low threshold, and the problem is more serious with the cheap motor I bought. When I dialed down the current draw on the A4988 driver, this problem was also solved.
In hindsight, the NEMA-17 motors are probably a bit overkill, and next time when I’m simplifying the design I’ll probably test out cheaper 28YBJ-48 Stepper instead.
The base required 2 stepper motors: one to rotate the base horizontally, and one to rotate the mirror vertically.
The small 28YBJ-48 Stepper with ULN2003 driver was easy enough to set up with working tutorials. (Exception being I mistakenly used the 25V power supply instead of the 5V one, and proceeded to burn the motor control board… whoops. Lesson learned.)
The larger NEMA stepper was harder to set up, since it requires a custom library on Arduino. I also had to decide between using a A4988 or a bigger driver: microstep vs. more torque. I ultimately decided on the cheaper A4988, since the NEMA-17, again, seemed a bit overkill as the mirror base already reduced the friction highly.

I also wrote some Arduino code for the rotation calculations and such. Modularizing these into multiple files also made it much easier to work with. 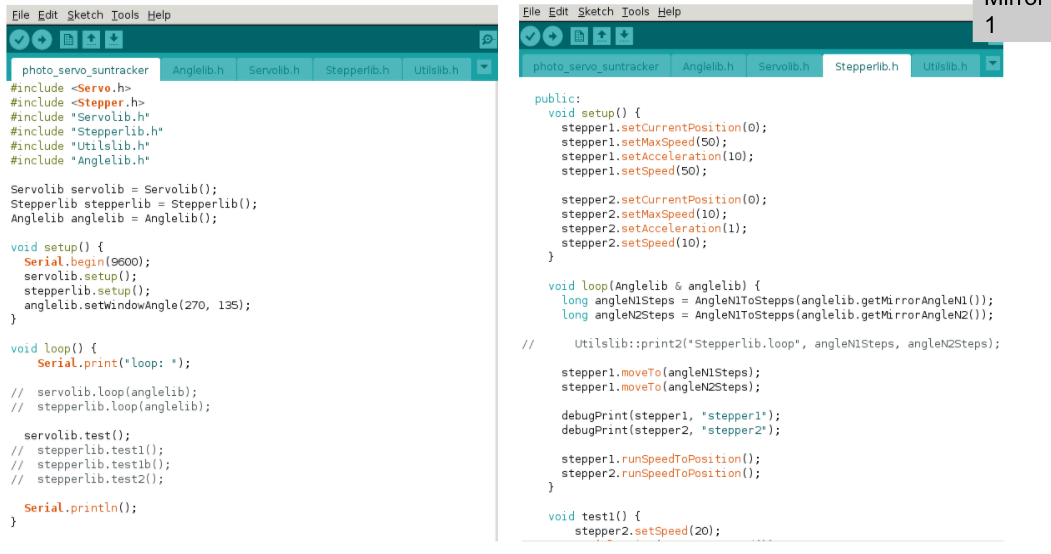
3. Testing (indoors)
Video demo: https://www.youtube.com/watch?v=qRRW8SRiqJk
For efficiently testing multiple conditions, I tested the device indoors. The blue plastic panel (on the right) represents the window where the mirror aims to direct the light, and the sun is represented by the flashlight (supplemented by my phone to simulate parallel sunlight rays).
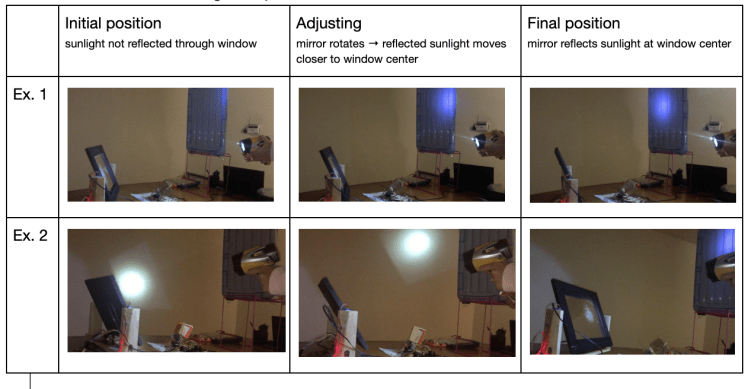
From the initial position to the final position, there are two primary steps involved:
- First, the suntracker rotates stepwise to aim towards the flashlight.
- The mirror calculates the corresponding change, and rotates the x and y stepper motors.
The first example shows the mirror adjusting to a light source originating from the North.
The second example shows the mirror adjusting to a light source originating from the West.
4. Mission accomplished!(?)
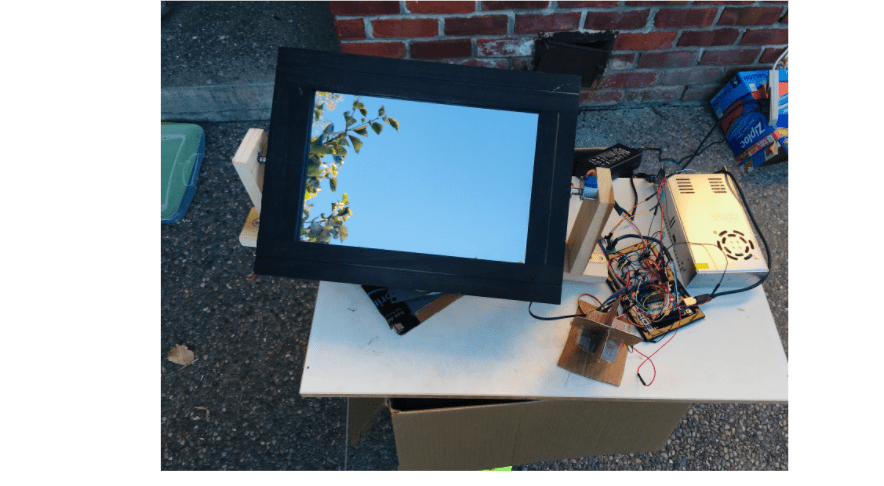
Prototype done –>
I tested the suntracker and the stepper motor base separately again, then ran the entire system. After fixing a bit of the code, it worked!
The results were pretty nice (unfiltered):
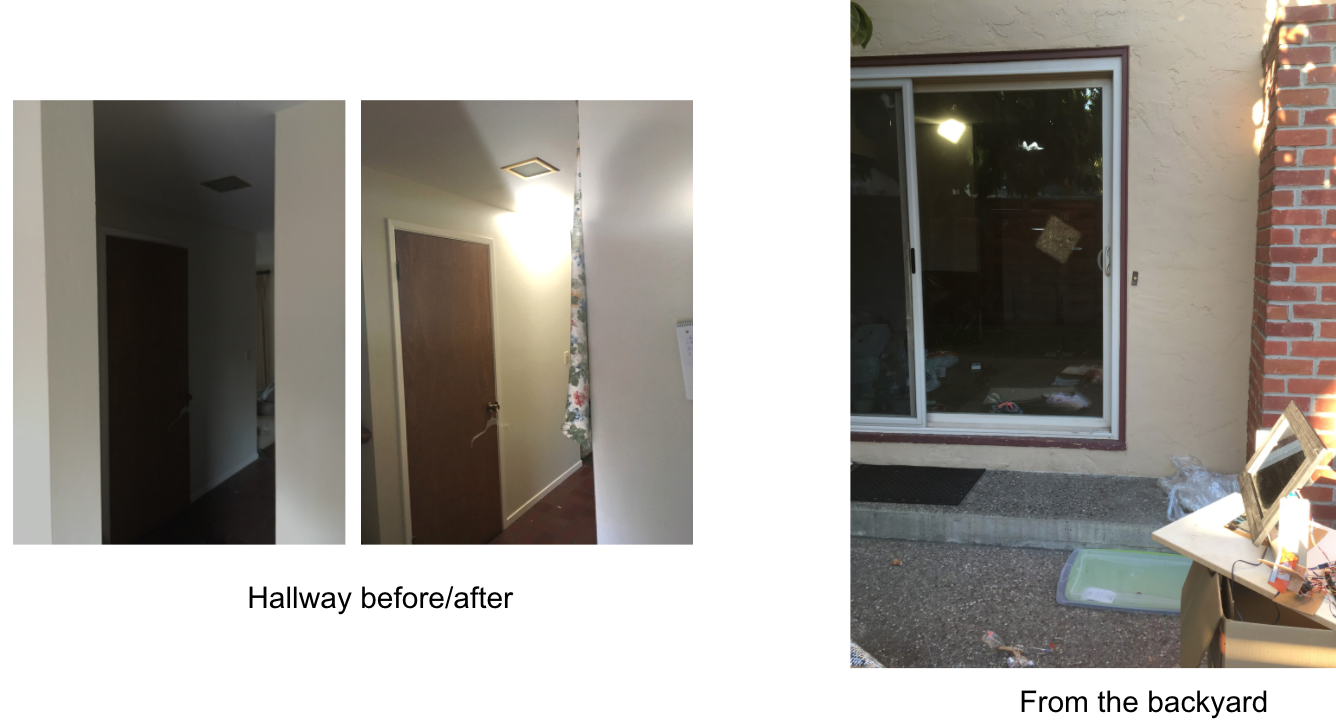
Later, I also optimized it to aim towards my house’s rather spooky-looking dark hallway, located right at the entrance. Turning on the lights all day had already burnt out multiple lightbulbs. So, I optimized the design to aim the reflected sunlight directly at the coordinates of the hallway entrance. This idea works as long as either entrance has a direct line of sight to a window (left tile).
What was achieved:
- A simple mechanical design with few parts
- Learned to use Arduino with sensors, servo motors, stepper motors
- End-to-end working prototype with 1-square-foot mirror that made our spooky-looking dark living room much more pleasant
What’s next:
- Prototype with a bigger mirror (ex. 6 sqft)
- Weather-proof and more reliable model
- More efficiently focus light (perhaps with 2 additional mirrors or Fresnel lens)
- Build more to distribute
4. Reflection
Going back to troubleshoot → test → repeat many times helped me learn many things not only about the specifics of stepper motors and torque calculations, but also the engineering and hands-on mentality to problem-solving. If one method doesn’t work, it was time to get creative.
After getting a first working prototype, there are a multitude of more avenues to explore. Right now, I’m using Fresnel lenses to focus more light onto the mirror, a diffraction grating on the inside ceiling to diffuse the beam more evenly, and a 3-mirror-system to increase angle and reduce flux loss.
From a more practical standpoint, my family noticed a pretty big difference in natural lighting (and general mood) after implementing my suntracking mirror prototype 🙂
